Table of Contents
ToggleInstalling kitchen cabinets is one of the most rewarding DIY projects you can tackle, it transforms your kitchen’s look and function without requiring professional labor costs. Whether you’re working with stock cabinets, semi-custom units, or full custom builds, the core installation method remains consistent. This guide walks you through the process, from layout planning to final adjustments. You’ll learn how to locate studs, secure cabinets properly to prevent sagging, and handle the inevitable adjustments that come with real-world kitchens. The difference between a sloppy install and a pro-level one often comes down to patience during prep work and precision in measuring. With the right tools and a methodical approach, homeowners with basic DIY experience can achieve cabinet-shop-quality results.
Key Takeaways
- Installing kitchen cabinets as a DIY project can save labor costs while delivering professional results when you prioritize precision measuring, stud location, and leveling throughout the process.
- Essential tools for cabinet installation include a stud finder, level, tape measure, drill/driver, and wooden shims—skipping these guarantees frustration and rework.
- Always install base cabinets first to create a stable platform, use at least two screws per cabinet section into studs or blocking, and ensure every cabinet is level before fastening to prevent sagging doors and misalignment.
- Upper cabinets require two-person installation with temporary supports and must be secured with 2.5-inch wood screws into studs, as a fully loaded cabinet can weigh 75+ pounds.
- After fastening, fine-tune door and drawer alignment using hinge adjustments to achieve consistent 1/8-inch gaps between doors, then seal gaps with paintable caulk for a finished, moisture-resistant appearance.
- Preparation is crucial: locate and mark studs before cabinets arrive, repair any drywall damage, photograph walls beforehand, and verify appliance openings to avoid cascading layout errors across your cabinet run.
Tools and Materials You’ll Need
Before you start, gather the correct tools, you’ll save yourself frustration and redo work. You’ll need a cordless drill/driver, a stud finder (essential: don’t eyeball it), a level (a 48-inch model works best for cabinets), a tape measure, a circular saw or miter saw for minor cuts, and shims (wooden wedges to level out uneven walls). Grab a pencil for marking, a square for layout, and clamps to hold cabinets temporarily in place while fastening. A power nailer or finish nailer speeds up trim work, though a hammer works too.
For fasteners, buy 2.5-inch wood screws rated for cabinet installation (or the manufacturer’s specs), finish nails if you’re adding face frame trim, and construction adhesive for backing up screw joints on heavier loads. Always wear safety glasses when drilling overhead, and keep work gloves handy for moving heavy cabinet boxes. Stock shims in multiple thickness ranges, you’ll be surprised how many uneven spots exist in older homes. Heavy cabinets (especially upper ones) demand at least two people: trying to hold a 100-pound unit level while drilling one-handed leads to accidents and misalignment.
Preparing Your Kitchen for Cabinet Installation
Start by turning off electricity to any outlets or switches you’ll be working near, and remove the old cabinets (or install into bare walls). Clear the workspace completely, debris, old shelving, and hardware get in the way. If your walls are uneven or you’re replacing older cabinets, check for water damage, mold, or soft spots in the drywall. Damaged areas need repair before cabinets go up: moisture trapped behind cabinets will cause rot and failure. Sand or patch any rough spots so cabinet backs sit flush.
If your kitchen has baseboards, you’ll typically remove or trim them back so the toe kick (the recessed bottom of the cabinet) can slide in. Mark any existing plumbing, gas lines, or electrical runs so you don’t accidentally drill into them. Take photographs of the wall before you start, these prove invaluable if something goes wrong during installation.
Measuring and Planning Your Layout
Measure three times, mark once. Use a level to find the highest point on your floor along the cabinet run. Cabinets sit on this high point, then shims level out dips. Find and mark the height of your base cabinet (typically 34.5 inches) from the highest floor point, then snap a chalk line. This line guides your cabinet positioning. Upper cabinets usually sit 18 inches above the countertop (which sits on base cabinets), but verify your countertop thickness, solid wood or waterfall edges add height.
Lay out the cabinet sequence on a sketch. Note door swing directions, appliance openings (cooktop, dishwasher gaps), and any obstacles. Small layout errors cascade across the entire run. Ensure cabinets don’t interfere with appliance doors or drawer pulls. If you’re tiling or adding a backsplash later, mark where it will sit to avoid cabinets covering necessary prep surfaces.
Finding and Marking the Stud Lines
This step separates disaster from success. Use a stud finder to locate wall studs, they’re typically 16 inches or 24 inches on center. Mark the center of each stud with a pencil or light-colored tape along your chalk line. Mark studs several feet beyond your cabinet run so you can see the pattern if it shifts.
If studs don’t align with your cabinet frame mounting locations (the back edge where screws go into the wall), you have limited options. You can use toggle bolts or heavy-duty ribbed anchors rated for the cabinet weight, but this isn’t ideal, studs carry load better. Some framers add blocking (short horizontal pieces of 2x lumber) between studs to create screw points: this is the pro move for stubborn layouts. Plan ahead: know where your studs are before cabinets arrive. Toggle anchors work in a pinch, but a cabinet loaded with dishes hanging on drywall fasteners will eventually sag.
Mark stud locations on the wall clearly, use a highlighter or tape so you can see them while drilling. A combination square helps verify that vertical lines are truly plumb before drilling. Missing a stud by an inch or two means your fastener is in sheetrock alone, and you’ll regret it when cabinet doors start binding.
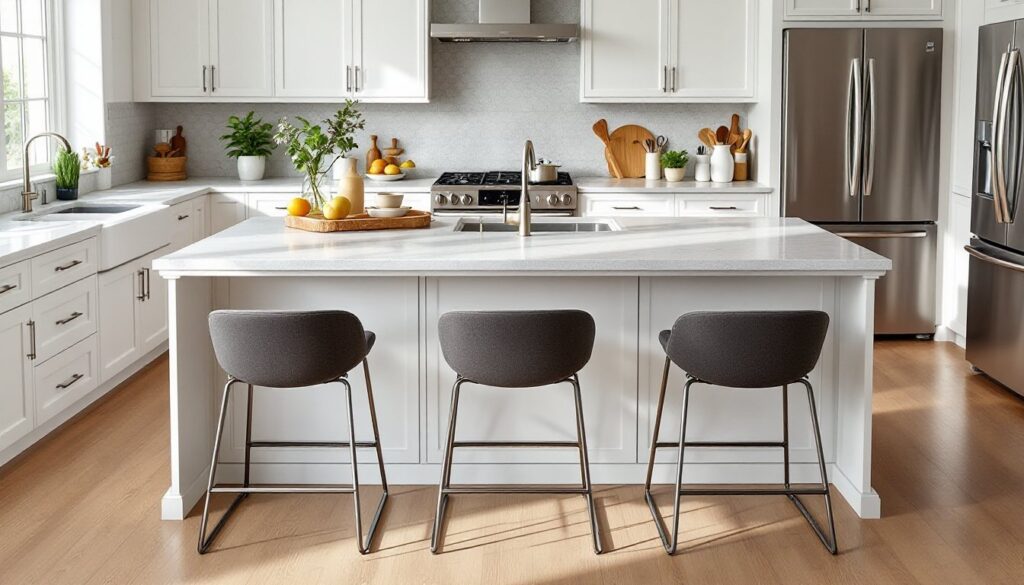
Installing Upper and Lower Cabinets
Start with lower cabinets unless your layout demands otherwise, they’re more stable and give you a work platform for uppers. Set your base cabinet against the wall using shims beneath the frame to match your chalk line height. Use a level to check side-to-side and front-to-back. Adjust shims until the cabinet is dead-level: this prevents doors and drawers from drifting open or closed.
Once leveled, attach the cabinet to the wall using 2.5-inch wood screws through the mounting rail (the horizontal strip on the back of the cabinet frame) into studs or blocking. Use at least two screws per cabinet section, and three if the span is long. Drill pilot holes first to prevent wood splitting and to keep screws straight. Check level again after the first screw, cabinetry can shift slightly during fastening. If cabinets sit on an uneven floor, shim under the cabinet feet, not just at the wall. A base cabinet that rocks is a structural problem waiting to happen.
Multiple cabinets run in a line, so they must align flush. Clamp adjacent cabinet fronts together before fastening, then tighten cabinet-to-cabinet fasteners (usually bolts or pocket hole screws) on the inside of the face frame. This keeps door faces flush and prevents visible seams. Stagger fasteners so you’re not all at one height, it distributes stress more evenly.
Securing Cabinets to the Wall
Wall fastening is non-negotiable on upper cabinets, gravity is real. Use heavy-duty screws (2.5-inch minimum) into studs. If a stud falls between cabinet sections, screw into the mounting rails of both cabinets straddling that stud. Upper cabinets are heavier than most homeowners expect: a 30-inch cabinet full of plates easily weighs 75+ pounds.
Install upper cabinets with two people, one holds it level and stable while the other fastens. Use temporary supports or a cabinet jack (a rented T-shaped brace) to hold the cabinet at height while you work. Eyeballing the height is how disaster happens. Measure from the base cabinets or countertop to position uppers consistently. If you’re installing cabinets recommended by industry guides like those at This Old House, follow their spacing standards: typically 18 inches from countertop to bottom of upper cabinet.
Check for level and plumb after every two or three cabinets. Small gaps that seem minor early compound into big problems later. Cabinets installed well sit flush, hang straight, and doors swing smoothly without adjustment.
Finishing Touches and Alignment
After all cabinets are fastened, check every door and drawer for clearance and smooth operation. Doors should swing freely without binding on adjacent cabinets or the frame. If doors drag, don’t force them, this means the cabinet is slightly out of plumb or twisted. Loosen fasteners, tap shims as needed, and re-check before re-tightening.
Adjust cabinet feet and hinges if supplied with adjustment mechanisms. Most modern hinges allow side-to-side and front-to-back tweaking without removing the door, use these adjustments to achieve even spacing between doors and gaps of roughly 1/8 inch. Uneven gaps scream “amateur install.” Take time here: it’s the difference between looking handmade and looking professional.
If cabinet ends are exposed, install finished end panels or filler strips to close gaps and hide raw wood. Caulk gaps between cabinets and walls with paintable silicone caulk to seal out moisture and dust. Caulk also makes the installation look seamless. Avoid foam sealants that expand unpredictably, they’ll push cabinets out of alignment.
Finally, kitchen organization solutions mentioned by experts like The Kitchn emphasize that cabinet interiors benefit from shelf liners and drawer organizers. These aren’t part of installation, but they make cabinets function better long-term and protect surfaces from spills and damage. Once cabinets are in place, backsplash, countertops, and hardware go in next, but that’s another project. Stand back, admire the level lines, smooth-closing doors, and your handiwork. A well-installed kitchen cabinet run is functional art that’ll outlast most trends.